"사막 축제"의 두 판 사이의 차이
Ipleproduction (토론 | 기여) |
|||
| (사용자 3명의 중간 판 23개는 보이지 않습니다) | |||
| 2번째 줄: | 2번째 줄: | ||
{{Spoiler}} | {{Spoiler}} | ||
[[File:Desert Festival.png|right|500px]] | [[File:Desert Festival.png|right|500px]] | ||
| − | + | '''사막 축제'''는 매년 [[봄]] 15일과 16일 17일에 [[사막]]에서 벌어지는 [[축제]]입니다. 비축제일과 달리 [[팸]]이 [[버스 정류장]]에 도착하기 전에도 사막에 들어갈 수 있습니다. 공식적으로는 매일 오전 10시에 시작되지만, 축제 마지막 날에는 [[팸]]이 평소보다 일찍 오전 9시에 도착해야 [[버스 정류장|버스]]를 탈 수 있습니다. 이 이벤트에 참여하려면 버스가 수리되어 있어야 합니다. | |
| − | [[ | + | [[샌디]]의 상점은 축제 기간 동안 열리지 않지만, 플레이어는 [[오아시스]]에 들어갈 수 있으며 [[사막 상인]]의 상점은 이용 가능합니다. |
| − | + | 여러 도전과 놀이를 통해 축제 통화인 [[File:Calico Egg.png|24px|link=]] [[칼리코 달걀]]을 얻을 수 있습니다. 칼리코 달걀은 게임 내에서 물리적 아이템으로 다양한 상점에서 아이템을 구매하는 데 사용할 수 있습니다. 이 달걀은 날마다 유지되지만, 축제가 끝나면 상자나 인벤토리에서 사라지며 다음 해로 이어지지 않습니다. | |
| − | The eggs can be | + | 달걀은 [[배송|배송 상자]]에 팔 수 있지만, 판매 가격은 {{Price|0}}입니다. |
| + | |||
| + | ==Attractions== | ||
| + | ===The Races=== | ||
| + | 하루 종일 매 시간마다 열리는 경주에 베팅할 수 있습니다. 플레이어가 선택한 참가자가 승리하면 {{Price|20|Calico}}을 받습니다. 플레이어가 가장 느린 참가자인 Escar-go에 처음으로 베팅하여 승리할 경우 {{Price|100|Calico}}<ref name="racewin" />을 받습니다. 플레이어는 오후 9시 50분까지 베팅할 수 있습니다.<ref name="racebet" /> 플레이어가 주요 축제 구역에 없으면 경주가 진행되지 않으므로, 결과를 확인하려면 ''반드시'' 기다려야 합니다. | ||
| + | |||
| + | 플레이어는 오아시스 옆의 수상한 남자에게 {{Price|1|Calico}}를 주고 원하는 경주 참가자를 탈락시킬 수 있습니다. | ||
| + | |||
| + | 5명의 참가자는 스피드 루스터, 킹 스팅, 슈비스킷, 에스카-고, Cactus Crawler입니다. 매일 3명의 참가자만 경주에 참여합니다. | ||
| + | |||
| + | <gallery mode="nolines" widths="72px"> | ||
| + | File:Speed Rooster.png|스피드 루스터 | ||
| + | File:King Sting.png|킹 스팅 | ||
| + | File:Shoebiscuit.png|슈비스킷 | ||
| + | File:Escar-go.png|에스카-고 | ||
| + | File:Cactus Crawler.png|Cactus Crawler | ||
| + | </gallery> | ||
| + | {{Clear}} | ||
| + | |||
| + | ===Calico Egg Merchant=== | ||
| + | 칼리코 달걀 상인은 여러 액세서리와 가구 아이템, 다양한 사용 가능한 아이템을 판매합니다. 일부 아이템은 매일 판매되며, 다른 아이템은 특정 날에만 구매할 수 있습니다.<ref name="shoplists" /> 한정 수량의 아이템은 매일 보충됩니다. | ||
| + | |||
| + | {|class="wikitable mw-collapsible mw-collapsed" | ||
| + | !colspan="3" style="text-align: left;"|Permanent Stock | ||
| + | |- | ||
| + | !Image | ||
| + | !Name | ||
| + | !Price | ||
| + | |- | ||
| + | |[[File:Mystery Box.png|center]] | ||
| + | |[[Mystery Box]] (10) <!--10 are stocked--> | ||
| + | |{{Price|20|Calico}} | ||
| + | |- | ||
| + | |[[File:Mummy Mask.png|center]] | ||
| + | |[[Mummy Mask]] | ||
| + | |{{Price|120|Calico}} | ||
| + | |- | ||
| + | |[[File:Blue Bow.png|center]] | ||
| + | |[[Blue Bow]] | ||
| + | |{{Price|50|Calico}} | ||
| + | |- | ||
| + | |[[File:Dark Velvet Bow.png|center]] | ||
| + | |[[Dark Velvet Bow]] | ||
| + | |{{Price|75|Calico}} | ||
| + | |- | ||
| + | |[[File:Mega Bomb.png|center]] | ||
| + | |[[Mega Bomb]] | ||
| + | |{{Price|15|Calico}} | ||
| + | |- | ||
| + | |[[File:Spicy Eel.png|center]] | ||
| + | |[[Spicy Eel]]* (5) | ||
| + | |{{Price|10|Calico}} | ||
| + | |- | ||
| + | |[[File:Crab Cakes.png|center]] | ||
| + | |[[Crab Cakes]]* (5) | ||
| + | |{{Price|10|Calico}} | ||
| + | |- | ||
| + | |[[File:Eggplant Parmesan.png|center]] | ||
| + | |[[Eggplant Parmesan]]* (5) | ||
| + | |{{Price|10|Calico}} | ||
| + | |- | ||
| + | |[[File:Pumpkin Soup.png|center]] | ||
| + | |[[Pumpkin Soup]]* (5) | ||
| + | |{{Price|10|Calico}} | ||
| + | |- | ||
| + | |[[File:Lucky Lunch.png|center]] | ||
| + | |[[Lucky Lunch]]* (5) | ||
| + | |{{Price|10|Calico}} | ||
| + | |- | ||
| + | |[[File:Woodcutter's Weekly.png|center]] | ||
| + | |[[Woodcutter's Weekly]] | ||
| + | |{{Price|100|Calico}} | ||
| + | |- | ||
| + | |colspan="3"|<nowiki>*</nowiki>''Note: one of these five dishes is randomly chosen. | ||
| + | |} | ||
| + | |||
| + | {|class="wikitable mw-collapsible mw-collapsed" | ||
| + | |- | ||
| + | !colspan="4" style="text-align: left;"|Rotating Stock | ||
| + | |- | ||
| + | | style="background-color: transparent;"| | ||
| + | {|class="wikitable sortable" style="float: left; margin-right: 12px; width: 31%;" | ||
| + | !colspan="3"|Spring 15 | ||
| + | |- | ||
| + | !class="unsortable"|Image | ||
| + | !Name | ||
| + | !Price | ||
| + | |- | ||
| + | |[[File:Strawberry Seeds.png|48px|center]] | ||
| + | |[[Strawberry Seeds]] | ||
| + | |{{Price|5|Calico}} | ||
| + | |- | ||
| + | |[[File:Sun Dunes.png|48px|center]] | ||
| + | |[[Sun Dunes]] | ||
| + | |{{Price|30|Calico}} | ||
| + | |- | ||
| + | |[[File:Sandy Rug.png|48px|center]] | ||
| + | |[[Sandy Rug]] | ||
| + | |{{Price|20|Calico}} | ||
| + | |- | ||
| + | |[[File:Desert End Table.png|48px|center]] | ||
| + | |[[Desert End Table]] | ||
| + | |{{Price|20|Calico}} | ||
| + | |- | ||
| + | |[[File:Calico Statue.png|48px|center]] | ||
| + | |[[Calico Statue]] | ||
| + | |{{Price|25|Calico}} | ||
| + | |} | ||
| + | |||
| + | {|class="wikitable sortable" style="float: left; margin-right: 12px; width: 31%;" | ||
| + | !colspan="3"|Spring 16 | ||
| + | |- | ||
| + | !class="unsortable"|Image | ||
| + | !Name | ||
| + | !Price | ||
| + | |- | ||
| + | |[[File:Mixed Seeds.png|48px|center]] | ||
| + | |[[Mixed Seeds]] x3 (10) <!--10 sets of 3 are stocked--> | ||
| + | |{{Price|5|Calico}} | ||
| + | |- | ||
| + | |[[File:Desert Table.png|48px|center]] | ||
| + | |[[Desert Table]] | ||
| + | |{{Price|25|Calico}} | ||
| + | |- | ||
| + | |[[File:Desert Chair.png|48px|center]] | ||
| + | |[[Desert Chair]] | ||
| + | |{{Price|20|Calico}} | ||
| + | |- | ||
| + | |[[File:Decorative Barrel.png|48px|center]] | ||
| + | |[[Decorative Barrel]] | ||
| + | |{{Price|10|Calico}} | ||
| + | |} | ||
| + | |||
| + | {|class="wikitable sortable" style="float: left; width: 31%;" | ||
| + | !colspan="3"|Spring 17 | ||
| + | |- | ||
| + | !class="unsortable"|Image | ||
| + | !Name | ||
| + | !Price | ||
| + | |- | ||
| + | |[[File:Strawberry Seeds.png|48px|center]] | ||
| + | |[[Strawberry Seeds]] | ||
| + | |{{Price|6|Calico}} | ||
| + | |- | ||
| + | |[[File:Magic Rock Candy.png|48px|center]] | ||
| + | |[[Magic Rock Candy]] (1) | ||
| + | |{{Price|250|Calico}} | ||
| + | |- | ||
| + | |[[File:Calico Statue.png|48px|center]] | ||
| + | |[[Calico Statue]] | ||
| + | |{{Price|35|Calico}} | ||
| + | |- | ||
| + | |[[File:Desert Fireplace.png|48px|center]] | ||
| + | |[[Desert Fireplace]] | ||
| + | |{{Price|20|Calico}} | ||
| + | |- | ||
| + | |[[File:Desert Flags.png|48px|center]] | ||
| + | |[[Desert Flags]] | ||
| + | |{{Price|10|Calico}} | ||
| + | |- | ||
| + | |[[File:Desert Rug.png|48px|center]] | ||
| + | |[[Desert Rug]] | ||
| + | |{{Price|25|Calico}} | ||
| + | |} | ||
| + | |} | ||
| + | |||
| + | ===Villager Shops=== | ||
| + | 매일 두 명의 [[마을 사람들|마을 사람]]이 무작위로 선택되어 축제에서 자신만의 상점을 운영합니다.<ref name="villagerchance" /> 이 상점들은 오후 12시부터 자정까지 운영되며, 그들의 재고 목록은 아래에 나와 있습니다.<ref name="shoplists" /> 한정 수량의 아이템은 마을 사람이 상점을 운영하는 날마다 보충됩니다. 플레이어는 마을 사람 상점의 뒤로 들어갈 수 있어, 마을 사람들이 상점에 있을 때도 선물 주기, 대화, 퀘스트 완료가 가능합니다. | ||
| + | |||
| + | {| | ||
| + | |- | ||
| + | |style="vertical-align: top; float: left; margin-right: 36px;"| | ||
| + | {|class="wikitable mw-collapsible mw-collapsed" | ||
| + | !colspan="3" style="text-align: left;"|{{NPC|Abigail|placement=inline}} - Permanent Stock | ||
| + | |- | ||
| + | !Image | ||
| + | !Name | ||
| + | !Price | ||
| + | |- | ||
| + | |[[File:Abigail's Bow.png|center]] | ||
| + | |[[Abigail's Bow]] | ||
| + | |{{Price|60|Calico}} | ||
| + | |- | ||
| + | |[[File:Abby's Planchette.png|center]] | ||
| + | |[[Abby's Planchette]] | ||
| + | |{{Price|70|Calico}} | ||
| + | |} | ||
| + | |||
| + | {|class="wikitable mw-collapsible mw-collapsed" | ||
| + | !colspan="3" style="text-align: left;"|{{NPC|Alex|placement=inline}} - Permanent Stock | ||
| + | |- | ||
| + | !Image | ||
| + | !Name | ||
| + | !Price | ||
| + | |- | ||
| + | |[[File:Magic Hair Gel.png|center]] | ||
| + | |[[Magic Hair Gel]]* | ||
| + | |{{Price|100|Calico}} | ||
| + | |- | ||
| + | |[[File:Alex's Bat.png|center]] | ||
| + | |[[Alex's Bat]] | ||
| + | |{{Price|70|Calico}} | ||
| + | |- | ||
| + | |[[File:Muscle Remedy.png|center]] | ||
| + | |[[Muscle Remedy]] x5 (1) <!--1 set of 5 is stocked--> | ||
| + | |{{Price|25|Calico}} | ||
| + | |- | ||
| + | |[[File:Fried Egg.png|center]] | ||
| + | |[[Fried Egg]] (5) <!--5 are stocked--> | ||
| + | |{{Price|10|Calico}} | ||
| + | |- | ||
| + | |[[File:Milk.png|center]] | ||
| + | |[[Milk]] (5) | ||
| + | |{{Price|10|Calico}} | ||
| + | |- | ||
| + | |[[File:Pancakes.png|center]] | ||
| + | |[[Pancakes]] (5) | ||
| + | |{{Price|10|Calico}} | ||
| + | |- | ||
| + | |[[File:Hashbrowns.png|center]] | ||
| + | |[[Hashbrowns]] (5) | ||
| + | |{{Price|10|Calico}} | ||
| + | |- | ||
| + | |colspan="3"|<nowiki>*</nowiki>''Note: only available after [[Mastery Cave#Masteries|Combat Mastery]] has been claimed.'' | ||
| + | |} | ||
| + | |||
| + | {|class="wikitable mw-collapsible mw-collapsed" | ||
| + | !colspan="3" style="text-align: left;"|{{NPC|Caroline|placement=inline}} - Permanent Stock | ||
| + | |- | ||
| + | !Image | ||
| + | !Name | ||
| + | !Price | ||
| + | |- | ||
| + | |[[File:Exotic Palace.png|48px|center]] | ||
| + | |[[Exotic Palace]] | ||
| + | |{{Price|120|Calico}} | ||
| + | |- | ||
| + | |[[File:Green Tea.png|center]] | ||
| + | |[[Green Tea]] (5) | ||
| + | |{{Price|10|Calico}} | ||
| + | |- | ||
| + | |[[File:Tea Sapling.png|center]] | ||
| + | |[[Tea Sapling]] (10) | ||
| + | |{{Price|30|Calico}} | ||
| + | |- | ||
| + | |[[File:Classic Lamp.png|48px|center]] | ||
| + | |[[Classic Lamp]] | ||
| + | |{{Price|40|Calico}} | ||
| + | |- | ||
| + | |[[File:Dandelion.png|center]] | ||
| + | |[[Dandelion]] (5) | ||
| + | |{{Price|10|Calico}} | ||
| + | |} | ||
| + | |||
| + | {|class="wikitable mw-collapsible mw-collapsed" | ||
| + | !colspan="3" style="text-align: left;"|{{NPC|Clint|placement=inline}} - Permanent Stock | ||
| + | |- | ||
| + | !Image | ||
| + | !Name | ||
| + | !Price | ||
| + | |- | ||
| + | |[[File:Coal.png|center]] | ||
| + | |[[Coal]] (50) | ||
| + | |{{Price|5|Calico}} | ||
| + | |- | ||
| + | |[[File:Copper Ore.png|center]] | ||
| + | |[[Copper Ore]] (100) | ||
| + | |{{Price|2|Calico}} | ||
| + | |- | ||
| + | |[[File:Iron Ore.png|center]] | ||
| + | |[[Iron Ore]] (100) | ||
| + | |{{Price|4|Calico}} | ||
| + | |} | ||
| + | |||
| + | {|class="wikitable mw-collapsible mw-collapsed" | ||
| + | !colspan="3" style="text-align: left;"|{{NPC|Demetrius|placement=inline}} - Permanent Stock | ||
| + | |- | ||
| + | !Image | ||
| + | !Name | ||
| + | !Price | ||
| + | |- | ||
| + | |[[File:Periodic Table.png|48px|center]] | ||
| + | |[[Periodic Table]] | ||
| + | |{{Price|70|Calico}} | ||
| + | |- | ||
| + | |[[File:Nautilus Shell.png|center]] | ||
| + | |[[Nautilus Shell]] (1) | ||
| + | |{{Price|50|Calico}} | ||
| + | |- | ||
| + | |[[File:Spice Berry.png|center]] | ||
| + | |[[Spice Berry]] (3) | ||
| + | |{{Price|10|Calico}} | ||
| + | |- | ||
| + | |[[File:Deluxe Speed-Gro.png|center]] | ||
| + | |[[Deluxe Speed-Gro]] (100) | ||
| + | |{{Price|2|Calico}} | ||
| + | |} | ||
| + | |||
| + | {|class="wikitable mw-collapsible mw-collapsed" | ||
| + | !colspan="3" style="text-align: left;"|{{NPC|Elliott|placement=inline}} - Permanent Stock | ||
| + | |- | ||
| + | !Image | ||
| + | !Name | ||
| + | !Price | ||
| + | |- | ||
| + | |[[File:Elliott's Pencil.png|center]] | ||
| + | |[[Elliott's Pencil]] | ||
| + | |{{Price|70|Calico}} | ||
| + | |- | ||
| + | |[[File:Tricorn Hat.png|center]] | ||
| + | |[[Tricorn Hat]] (5) | ||
| + | |{{Price|100|Calico}} | ||
| + | |- | ||
| + | |[[File:Crab.png|center]] | ||
| + | |[[Crab]] (5) | ||
| + | |{{Price|30|Calico}} | ||
| + | |- | ||
| + | |[[File:Squid Ink.png|center]] | ||
| + | |[[Squid Ink]] (5) | ||
| + | |{{Price|30|Calico}} | ||
| + | |} | ||
| + | |||
| + | {|class="wikitable mw-collapsible mw-collapsed" | ||
| + | !colspan="3" style="text-align: left;"|{{NPC|Emily|placement=inline}} - Permanent Stock | ||
| + | |- | ||
| + | !Image | ||
| + | !Name | ||
| + | !Price | ||
| + | |- | ||
| + | |[[File:Cloth.png|center]] | ||
| + | |[[Cloth]] x5 (3) | ||
| + | |{{Price|25|Calico}} | ||
| + | |- | ||
| + | |[[File:Prismatic Shard.png|center]] | ||
| + | |[[Prismatic Shard]] | ||
| + | |{{Price|500|Calico}} | ||
| + | |- | ||
| + | |[[File:Sea Urchin.png|center]] | ||
| + | |[[Sea Urchin]] (5) | ||
| + | |{{Price|5|Calico}} | ||
| + | |- | ||
| + | |[[File:Mixed Flower Seeds.png|center]] | ||
| + | |[[Mixed Flower Seeds]] x5 (4) | ||
| + | |{{Price|8|Calico}} | ||
| + | |} | ||
| + | |||
| + | {|class="wikitable mw-collapsible mw-collapsed" | ||
| + | !colspan="3" style="text-align: left;"|{{NPC|Evelyn|placement=inline}} - Permanent Stock | ||
| + | |- | ||
| + | !Image | ||
| + | !Name | ||
| + | !Price | ||
| + | |- | ||
| + | |[[File:Wallpaper 116 Icon.png|48px|center]] | ||
| + | |[[Wallpaper]] | ||
| + | |{{Price|20|Calico}} | ||
| + | |- | ||
| + | |[[File:Cookie.png|center]] | ||
| + | |[[Cookie]] (5) | ||
| + | |{{Price|20|Calico}} | ||
| + | |- | ||
| + | |[[File:Mixed Seeds.png|center]] | ||
| + | |[[Mixed Seeds]] (25) | ||
| + | |{{Price|4|Calico}} | ||
| + | |- | ||
| + | |[[File:Mixed Flower Seeds.png|center]] | ||
| + | |[[Mixed Flower Seeds]] (50) | ||
| + | |{{Price|2|Calico}} | ||
| + | |- | ||
| + | |[[File:Daffodil.png|center]] | ||
| + | |[[Daffodil]] (5) | ||
| + | |{{Price|15|Calico}} | ||
| + | |} | ||
| + | |||
| + | {|class="wikitable mw-collapsible mw-collapsed" | ||
| + | !colspan="3" style="text-align: left;"|{{NPC|George|placement=inline}} - Permanent Stock | ||
| + | |- | ||
| + | !Image | ||
| + | !Name | ||
| + | !Price | ||
| + | |- | ||
| + | |[[File:Retro TV.png|48px|center]] | ||
| + | |[[Retro TV]] | ||
| + | |{{Price|200|Calico}} | ||
| + | |- | ||
| + | |[[File:Coffee.png|center]] | ||
| + | |[[Coffee]] (10) | ||
| + | |{{Price|10|Calico}} | ||
| + | |- | ||
| + | |[[File:Vinegar.png|center]] | ||
| + | |[[Vinegar]] (20) | ||
| + | |{{Price|5|Calico}} | ||
| + | |- | ||
| + | |[[File:Morel.png|center]] | ||
| + | |[[Morel]] (1) | ||
| + | |{{Price|30|Calico}} | ||
| + | |- | ||
| + | |[[File:Artifact Trove.png|center]] | ||
| + | |[[Artifact Trove]] (5) | ||
| + | |{{Price|10|Calico}} | ||
| + | |} | ||
| + | |||
| + | |style="vertical-align: top; float: left; margin-right: 36px;"| | ||
| + | |||
| + | {|class="wikitable mw-collapsible mw-collapsed" | ||
| + | !colspan="3" style="text-align: left;"|{{NPC|Gus|placement=inline}} - Permanent Stock | ||
| + | |- | ||
| + | !Image | ||
| + | !Name | ||
| + | !Price | ||
| + | |- | ||
| + | |[[File:Dusty Skull.png|48px|center]] | ||
| + | |[[Dusty Skull]] | ||
| + | |{{Price|50|Calico}} | ||
| + | |- | ||
| + | |[[File:Escargot.png|center]] | ||
| + | |[[Escargot]] (5) | ||
| + | |{{Price|30|Calico}} | ||
| + | |- | ||
| + | |[[File:Lobster Bisque.png|center]] | ||
| + | |[[Lobster Bisque]] (5) | ||
| + | |{{Price|30|Calico}} | ||
| + | |- | ||
| + | |[[File:Squid Ink Ravioli.png|center]] | ||
| + | |[[Squid Ink Ravioli]] (5) | ||
| + | |{{Price|30|Calico}} | ||
| + | |- | ||
| + | |[[File:Eggplant Parmesan.png|center]] | ||
| + | |[[Eggplant Parmesan]] (5) | ||
| + | |{{Price|30|Calico}} | ||
| + | |} | ||
| + | |||
| + | {|class="wikitable mw-collapsible mw-collapsed" | ||
| + | !colspan="3" style="text-align: left;"|{{NPC|Haley|placement=inline}} - Permanent Stock | ||
| + | |- | ||
| + | !Image | ||
| + | !Name | ||
| + | !Price | ||
| + | |- | ||
| + | |[[File:Haley's Iron.png|center]] | ||
| + | |[[Haley's Iron]] | ||
| + | |{{Price|70|Calico}} | ||
| + | |- | ||
| + | |[[File:Art Photo.png|center]] | ||
| + | |[[Art Photo]] | ||
| + | |{{Price|30|Calico}} | ||
| + | |- | ||
| + | |[[File:Art Photo 2.png|center]] | ||
| + | |[[Art Photo 2]] | ||
| + | |{{Price|30|Calico}} | ||
| + | |- | ||
| + | |[[File:Pink Cake.png|center]] | ||
| + | |[[Pink Cake]] (5) | ||
| + | |{{Price|20|Calico}} | ||
| + | |} | ||
| + | |||
| + | {|class="wikitable mw-collapsible mw-collapsed" | ||
| + | !colspan="3" style="text-align: left;"|{{NPC|Harvey|placement=inline}} - Permanent Stock | ||
| + | |- | ||
| + | !Image | ||
| + | !Name | ||
| + | !Price | ||
| + | |- | ||
| + | |[[File:Harvey's Mallet.png|center]] | ||
| + | |[[Harvey's Mallet]] | ||
| + | |{{Price|70|Calico}} | ||
| + | |- | ||
| + | |[[File:Radio Desk.png|48px|center]] | ||
| + | |[[Radio Desk]] | ||
| + | |{{Price|40|Calico}} | ||
| + | |- | ||
| + | |[[File:Model Planes.png|48px|center]] | ||
| + | |[[Model Planes]] | ||
| + | |{{Price|30|Calico}} | ||
| + | |- | ||
| + | |[[File:Coffee.png|center]] | ||
| + | |[[Coffee]] x5 (5) | ||
| + | |{{Price|10|Calico}} | ||
| + | |} | ||
| + | |||
| + | {|class="wikitable mw-collapsible mw-collapsed" | ||
| + | !colspan="3" style="text-align: left;"|{{NPC|Jas|placement=inline}} - Permanent Stock | ||
| + | |- | ||
| + | !Image | ||
| + | !Name | ||
| + | !Price | ||
| + | |- | ||
| + | |[[File:Wallpaper 113 Icon.png|48px|center]] | ||
| + | |[[Wallpaper]] | ||
| + | |{{Price|20|Calico}} | ||
| + | |- | ||
| + | |[[File:Ancient Doll.png|center]] | ||
| + | |[[Ancient Doll]] (1) | ||
| + | |{{Price|1|Calico}} | ||
| + | |- | ||
| + | |[[File:Fairy Seeds.png|center]] | ||
| + | |[[Fairy Seeds]] (25) | ||
| + | |{{Price|5|Calico}} | ||
| + | |- | ||
| + | |[[File:Rabbit's Foot.png|center]] | ||
| + | |[[Rabbit's Foot]] (1) | ||
| + | |{{Price|100|Calico}} | ||
| + | |- | ||
| + | |[[File:Magic Rock Candy.png|center]] | ||
| + | |[[Magic Rock Candy]] (1) | ||
| + | |{{Price|300|Calico}} | ||
| + | |} | ||
| + | |||
| + | {|class="wikitable mw-collapsible mw-collapsed" | ||
| + | !colspan="3" style="text-align: left;"|{{NPC|Jodi|placement=inline}} - Permanent Stock | ||
| + | |- | ||
| + | !Image | ||
| + | !Name | ||
| + | !Price | ||
| + | |- | ||
| + | |[[File:Wallpaper 117 Icon.png|48px|center]] | ||
| + | |[[Wallpaper]] | ||
| + | |{{Price|20|Calico}} | ||
| + | |- | ||
| + | |[[File:Crispy Bass.png|center]] | ||
| + | |[[Crispy Bass]] x3 (5) | ||
| + | |{{Price|25|Calico}} | ||
| + | |- | ||
| + | |[[File:Mixed Seeds.png|center]] | ||
| + | |[[Mixed Seeds]] (25) | ||
| + | |{{Price|5|Calico}} | ||
| + | |- | ||
| + | |[[File:Mixed Flower Seeds.png|center]] | ||
| + | |[[Mixed Flower Seeds]] (50) | ||
| + | |{{Price|2|Calico}} | ||
| + | |} | ||
| + | |||
| + | {|class="wikitable mw-collapsible mw-collapsed" | ||
| + | !colspan="3" style="text-align: left;"|{{NPC|Kent|placement=inline}} - Permanent Stock | ||
| + | |- | ||
| + | !Image | ||
| + | !Name | ||
| + | !Price | ||
| + | |- | ||
| + | |[[File:Wallpaper 114 Icon.png|48px|center]] | ||
| + | |[[Wallpaper]] | ||
| + | |{{Price|20|Calico}} | ||
| + | |- | ||
| + | |[[File:Fiddlehead Fern.png|center]] | ||
| + | |[[Fiddlehead Fern]] (5) | ||
| + | |{{Price|10|Calico}} | ||
| + | |- | ||
| + | |[[File:Staircase.png|center]] | ||
| + | |[[Staircase]] (10) | ||
| + | |{{Price|30|Calico}} | ||
| + | |- | ||
| + | |[[File:Wood Chipper.png|center]] | ||
| + | |[[Wood Chipper]] (1) | ||
| + | |{{Price|25|Calico}} | ||
| + | |- | ||
| + | |[[File:Hazelnut.png|center]] | ||
| + | |[[Hazelnut]] (5) | ||
| + | |{{Price|10|Calico}} | ||
| + | |} | ||
| + | |||
| + | {|class="wikitable mw-collapsible mw-collapsed" | ||
| + | !colspan="3" style="text-align: left;"|{{NPC|Leah|placement=inline}} - Permanent Stock | ||
| + | |- | ||
| + | !Image | ||
| + | !Name | ||
| + | !Price | ||
| + | |- | ||
| + | |[[File:Leah's Whittler.png|center]] | ||
| + | |[[Leah's Whittler]] | ||
| + | |{{Price|70|Calico}} | ||
| + | |- | ||
| + | |[[File:Short Bookcase.png|48px|center]] | ||
| + | |[[Short Bookcase]] | ||
| + | |{{Price|40|Calico}} | ||
| + | |- | ||
| + | |[[File:Hardwood.png|center]] | ||
| + | |[[Hardwood]] (100) | ||
| + | |{{Price|3|Calico}} | ||
| + | |- | ||
| + | |[[File:Salad.png|center]] | ||
| + | |[[Salad]] (5) | ||
| + | |{{Price|20|Calico}} | ||
| + | |} | ||
| + | |||
| + | {|class="wikitable mw-collapsible mw-collapsed" | ||
| + | !colspan="3" style="text-align: left;"|{{NPC|Leo|placement=inline}} - Permanent Stock | ||
| + | |- | ||
| + | !Image | ||
| + | !Name | ||
| + | !Price | ||
| + | |- | ||
| + | |[[File:Wallpaper 119 Icon.png|48px|center]] | ||
| + | |[[Wallpaper]] | ||
| + | |{{Price|20|Calico}} | ||
| + | |- | ||
| + | |[[File:Poi.png|center]] | ||
| + | |[[Poi]] (5) | ||
| + | |{{Price|20|Calico}} | ||
| + | |- | ||
| + | |[[File:Tropical Curry.png|center]] | ||
| + | |[[Tropical Curry]] (5) | ||
| + | |{{Price|30|Calico}} | ||
| + | |- | ||
| + | |[[File:Banana Sapling.png|center]] | ||
| + | |[[Banana Sapling]] (1) | ||
| + | |{{Price|100|Calico}} | ||
| + | |} | ||
| + | |||
| + | {|class="wikitable mw-collapsible mw-collapsed" | ||
| + | !colspan="3" style="text-align: left;"|{{NPC|Marnie|placement=inline}} - Permanent Stock | ||
| + | |- | ||
| + | !Image | ||
| + | !Name | ||
| + | !Price | ||
| + | |- | ||
| + | |[[File:Wallpaper 115 Icon.png|48px|center]] | ||
| + | |[[Wallpaper]] | ||
| + | |{{Price|20|Calico}} | ||
| + | |- | ||
| + | |[[File:Grass Starter.png|center]] | ||
| + | |[[Grass Starter]] (100) | ||
| + | |{{Price|2|Calico}} | ||
| + | |- | ||
| + | |[[File:Hay.png|center]] | ||
| + | |[[Hay]] (150) | ||
| + | |{{Price|1|Calico}} | ||
| + | |- | ||
| + | |[[File:Truffle Oil.png|center]] | ||
| + | |[[Truffle Oil]] (1) | ||
| + | |{{Price|50|Calico}} | ||
| + | |} | ||
| + | |||
| + | |style="vertical-align: top; float: left;"| | ||
| + | |||
| + | {|class="wikitable mw-collapsible mw-collapsed" | ||
| + | !colspan="3" style="text-align: left;"|{{NPC|Maru|placement=inline}} - Permanent Stock | ||
| + | |- | ||
| + | !Image | ||
| + | !Name | ||
| + | !Price | ||
| + | |- | ||
| + | |[[File:Maru's Wrench.png|center]] | ||
| + | |[[Maru's Wrench]] | ||
| + | |{{Price|70|Calico}} | ||
| + | |- | ||
| + | |[[File:Iridium Bar.png|center]] | ||
| + | |[[Iridium Bar]] (2) | ||
| + | |{{Price|50|Calico}} | ||
| + | |- | ||
| + | |[[File:Shirt188.png|center]] | ||
| + | |[[Tailoring|Goodnight Shirt]] | ||
| + | |{{Price|25|Calico}} | ||
| + | |- | ||
| + | |[[File:Strawberry Seeds.png|center]] | ||
| + | |[[Strawberry Seeds]] (20) | ||
| + | |{{Price|10|Calico}} | ||
| + | |} | ||
| + | |||
| + | {|class="wikitable mw-collapsible mw-collapsed" | ||
| + | !colspan="3" style="text-align: left;"|{{NPC|Pam|placement=inline}} - Permanent Stock | ||
| + | |- | ||
| + | !Image | ||
| + | !Name | ||
| + | !Price | ||
| + | |- | ||
| + | |[[File:Beer.png|center]] | ||
| + | |[[Beer]] | ||
| + | |{{Price|20|Calico}} | ||
| + | |- | ||
| + | |[[File:Mead.png|center]] | ||
| + | |[[Mead]] | ||
| + | |{{Price|20|Calico}} | ||
| + | |- | ||
| + | |[[File:Pale Ale.png|center]] | ||
| + | |[[Pale Ale]] | ||
| + | |{{Price|30|Calico}} | ||
| + | |} | ||
| + | |||
| + | {|class="wikitable mw-collapsible mw-collapsed" | ||
| + | !colspan="3" style="text-align: left;"|{{NPC|Penny|placement=inline}} - Permanent Stock | ||
| + | |- | ||
| + | !Image | ||
| + | !Name | ||
| + | !Price | ||
| + | |- | ||
| + | |[[File:Penny's Fryer.png|center]] | ||
| + | |[[Penny's Fryer]] | ||
| + | |{{Price|70|Calico}} | ||
| + | |- | ||
| + | |[[File:Strawberry Decal.png|48px|center]] | ||
| + | |[[Strawberry Decal]] | ||
| + | |{{Price|100|Calico}} | ||
| + | |- | ||
| + | |[[File:Night Sky Decal 1.png|center]] | ||
| + | |[[Night Sky Decal 1]] | ||
| + | |{{Price|30|Calico}} | ||
| + | |- | ||
| + | |[[File:Night Sky Decal 2.png|center]] | ||
| + | |[[Night Sky Decal 2]] | ||
| + | |{{Price|30|Calico}} | ||
| + | |- | ||
| + | |[[File:Night Sky Decal 3.png|center]] | ||
| + | |[[Night Sky Decal 3]] | ||
| + | |{{Price|30|Calico}} | ||
| + | |- | ||
| + | |[[File:Pirate Flag.png|48px|center]] | ||
| + | |[[Pirate Flag]] | ||
| + | |{{Price|100|Calico}} | ||
| + | |} | ||
| + | |||
| + | {|class="wikitable mw-collapsible mw-collapsed" | ||
| + | !colspan="3" style="text-align: left;"|{{NPC|Pierre|placement=inline}} - Permanent Stock | ||
| + | |- | ||
| + | !Image | ||
| + | !Name | ||
| + | !Price | ||
| + | |- | ||
| + | |[[File:Pierre's Sign.png|48px|center]] | ||
| + | |[[Pierre's Sign]] | ||
| + | |{{Price|50|Calico}} | ||
| + | |- | ||
| + | |[[File:Calico Egg.png|center]] | ||
| + | |[[Calico Egg]] (200) | ||
| + | |{{Price|150}} | ||
| + | |- | ||
| + | |[[File:Squid.png|center]] | ||
| + | |[[Squid]] (5) | ||
| + | |{{Price|10|Calico}} | ||
| + | |- | ||
| + | |[[File:Wheat Flour.png|center]] | ||
| + | |[[Wheat Flour]] (100) | ||
| + | |{{Price|2|Calico}} | ||
| + | |- | ||
| + | |[[File:Oil.png|center]] | ||
| + | |[[Oil]] (100) | ||
| + | |{{Price|4|Calico}} | ||
| + | |} | ||
| + | |||
| + | {|class="wikitable mw-collapsible mw-collapsed" | ||
| + | !colspan="3" style="text-align: left;"|{{NPC|Robin|placement=inline}} - Permanent Stock | ||
| + | |- | ||
| + | !Image | ||
| + | !Name | ||
| + | !Price | ||
| + | |- | ||
| + | |[[File:Wallpaper 118 Icon.png|48px|center]] | ||
| + | |[[Wallpaper]] | ||
| + | |{{Price|20|Calico}} | ||
| + | |- | ||
| + | |[[File:Wood.png|center]] | ||
| + | |[[Wood]] (500) | ||
| + | |{{Price|1|Calico}} | ||
| + | |- | ||
| + | |[[File:Stone.png|center]] | ||
| + | |[[Stone]] (500) | ||
| + | |{{Price|1|Calico}} | ||
| + | |- | ||
| + | |[[File:Furniture Catalogue.png|48px|center]] | ||
| + | |[[Furniture Catalogue]] (1) | ||
| + | |{{Price|1000|Calico}} | ||
| + | |} | ||
| + | |||
| + | {|class="wikitable mw-collapsible mw-collapsed" | ||
| + | !colspan="3" style="text-align: left;"|{{NPC|Sam|placement=inline}} - Permanent Stock | ||
| + | |- | ||
| + | !Image | ||
| + | !Name | ||
| + | !Price | ||
| + | |- | ||
| + | |[[File:Sam's Skateboard.png|center]] | ||
| + | |[[Sam's Skateboard]] | ||
| + | |{{Price|50|Calico}} | ||
| + | |- | ||
| + | |[[File:Sam's Old Guitar.png|center]] | ||
| + | |[[Sam's Old Guitar]] | ||
| + | |{{Price|70|Calico}} | ||
| + | |- | ||
| + | |[[File:Maple Bar.png|center]] | ||
| + | |[[Maple Bar]] (5) | ||
| + | |{{Price|20|Calico}} | ||
| + | |- | ||
| + | |[[File:Joja Cola.png|center]] | ||
| + | |[[Joja Cola]] (6) | ||
| + | |{{Price|2|Calico}} | ||
| + | |} | ||
| + | |||
| + | {|class="wikitable mw-collapsible mw-collapsed" | ||
| + | !colspan="3" style="text-align: left;"|{{NPC|Sebastian|placement=inline}} - Permanent Stock | ||
| + | |- | ||
| + | !Image | ||
| + | !Name | ||
| + | !Price | ||
| + | |- | ||
| + | |[[File:Seb's Lost Mace.png|center]] | ||
| + | |[[Seb's Lost Mace]] | ||
| + | |{{Price|70|Calico}} | ||
| + | |- | ||
| + | |[[File:Frozen Geode.png|center]] | ||
| + | |[[Frozen Geode]] (5) | ||
| + | |{{Price|10|Calico}} | ||
| + | |- | ||
| + | |[[File:Energy Tonic.png|center]] | ||
| + | |[[Energy Tonic]] (5) | ||
| + | |{{Price|25|Calico}} | ||
| + | |} | ||
| + | |||
| + | {|class="wikitable mw-collapsible mw-collapsed" | ||
| + | !colspan="3" style="text-align: left;"|{{NPC|Shane|placement=inline}} - Permanent Stock | ||
| + | |- | ||
| + | !Image | ||
| + | !Name | ||
| + | !Price | ||
| + | |- | ||
| + | |[[File:Chicken Decal.png|48px|center]] | ||
| + | |[[Chicken Decal]] | ||
| + | |{{Price|60|Calico}} | ||
| + | |- | ||
| + | |[[File:Pizza.png|center]] | ||
| + | |[[Pizza]] (5) | ||
| + | |{{Price|5|Calico}} | ||
| + | |- | ||
| + | |[[File:Egg.png|center]] | ||
| + | |[[Egg]] (12) | ||
| + | |{{Price|1|Calico}} | ||
| + | |- | ||
| + | |[[File:Pepper Poppers.png|center]] | ||
| + | |[[Pepper Poppers]] x3 (3) | ||
| + | |{{Price|30|Calico}} | ||
| + | |} | ||
| + | |||
| + | {|class="wikitable mw-collapsible mw-collapsed" | ||
| + | !colspan="3" style="text-align: left;"|{{NPC|Vincent|placement=inline}} - Permanent Stock | ||
| + | |- | ||
| + | !Image | ||
| + | !Name | ||
| + | !Price | ||
| + | |- | ||
| + | |[[File:Fiber.png|center]] | ||
| + | |[[Fiber]] x10 (1) | ||
| + | |{{Price|1|Calico}} | ||
| + | |- | ||
| + | |[[File:Bug Meat.png|center]] | ||
| + | |[[Bug Meat]] (3) | ||
| + | |{{Price|1|Calico}} | ||
| + | |- | ||
| + | |[[File:Sap.png|center]] | ||
| + | |[[Sap]] (1) | ||
| + | |{{Price|1|Calico}} | ||
| + | |- | ||
| + | |[[File:Cave Carrot.png|center]] | ||
| + | |[[Cave Carrot]] (1) | ||
| + | |{{Price|2|Calico}} | ||
| + | |- | ||
| + | |[[File:Skeletal Hand.png|center]] | ||
| + | |[[Skeletal Hand]] (1) | ||
| + | |{{Price|2|Calico}} | ||
| + | |- | ||
| + | |[[File:Clay.png|center]] | ||
| + | |[[Clay]] (20) | ||
| + | |{{Price|1|Calico}} | ||
| + | |- | ||
| + | |[[File:Chipped Amphora.png|center]] | ||
| + | |[[Chipped Amphora]] (1) | ||
| + | |{{Price|1|Calico}} | ||
| + | |} | ||
| + | |||
| + | |- | ||
| + | |} | ||
| + | |||
| + | ===Emily's Outfit Services=== | ||
| + | 매일 에밀리와 샌디는 플레이어에게 짧은 컷신과 함께 무작위로 새 옷을 제공하는데, 여기서 에밀리는 "플레이어를 형상화한" 옷을 선택합니다. 플레이어의 원래 옷은 그들의 인벤토리에 배치됩니다. 만약 플레이어가 의류 서비스가 일어난 오두막에 다시 들어가려고 해도, 플레이어는 입장할 수 없고, 에밀리는 플레이어가 새 옷을 입으니 잘 어울린다고 말합니다. 에밀리가 마을 주민 가게를 운영하는 날에는 샌디가 약간의 망설임 끝에 인수인계를 할 것입니다. | ||
| + | |||
| + | 이곳엔 61개의 메이크오버 의상이 있습니다: 34개의 성중립적인 의상, 13개의 남성 전용 의상, 14개의 여성 전용 의상. <ref name="emily outfit" /> 각 의상은 셔츠, 팬티, 그리고 모자로 구성되어 있습니다. Of note, the [[Dark Ballcap]], [[Joja Cap]], and [[Laurel Wreath Crown]] can be obtained with three of the gender-neutral outfits. In addition, the [[Tight Pants]] can be obtained from a few outfits, and a "soft edge" variant of [[Tailoring#Shirts|Basic Pullover (M)]] can be obtained from one of the male-only outfits. | ||
| + | |||
| + | ===Chef=== | ||
| + | [[File:Chef Desert Festival.png|thumb|right|200px]] | ||
| + | The Chef gives the player a choice of ingredients to make them a meal with varying effects depending on the ingredients chosen. The player may do so repeatedly and choose different ingredients each time. The meal will be eaten; any effects will be applied immediately and last for 7 minutes.<ref name="answerdialogue" /> The buffs from dishes are a combination of buffs from both ingredient choices, e.g; Crystal Cake grants both {{name|Mining|+3|class=inline}} and {{name|Luck|+1|class=inline}} buffs. | ||
| + | |||
| + | Any dish will restore the player to maximum health and energy.<ref name="answerdialogue" /> In addition, these dishes '''will''' stack with any food or drink [[buffs]] from the player. | ||
| + | |||
| + | {| class="wikitable" | ||
| + | |+ style="text-align: left;"|All Available Dish Combinations: | ||
| + | |- | ||
| + | ! Choices: | ||
| + | ! Rich Marinara {{name|Defense|+1}} | ||
| + | ! Mushroom Creme {{name|Mining|+1}} | ||
| + | ! Cherry Syrup {{name|Luck|+1}} | ||
| + | ! Pungent Garlic {{name|Attack|+1}} | ||
| + | ! Uncomfortably Hot Sauce {{name|Speed|+1}} | ||
| + | |- | ||
| + | ! Hearty Beans {{name|Defense|+3}} | ||
| + | | N/A | ||
| + | | [[File:Earthy Mousse.png|24px|link=]] Earthy Mousse | ||
| + | | [[File:Sweet Bean Cake.png|24px|link=]] Sweet Bean Cake | ||
| + | | [[File:Skull Cave Casserole.png|24px|link=]] Skull Cave Casserole | ||
| + | | [[File:Spicy Tacos.png|24px|link=]] Spicy Tacos | ||
| + | |- | ||
| + | ! Cave Loaf {{name|Mining|+3}} | ||
| + | | [[File:Mountain Chili.png|24px|link=]] Mountain Chili | ||
| + | | N/A | ||
| + | | [[File:Crystal Cake.png|24px|link=]] Crystal Cake | ||
| + | | [[File:Cave Kebab.png|24px|link=]] Cave Kebab | ||
| + | | [[File:Hot Log.png|24px|link=]] Hot Log | ||
| + | |- | ||
| + | ! Rare Fruit {{name|Luck|+3}} | ||
| + | | [[File:Sour Salad.png|24px|link=]] Sour Salad | ||
| + | | [[File:Superfood Cake.png|24px|link=]] Superfood Cake | ||
| + | | N/A | ||
| + | | [[File:Warrior Smoothie.png|24px|link=]] Warrior Smoothie | ||
| + | | [[File:Rumpled Fruit Skin.png|24px|link=]] Rumpled Fruit Skin | ||
| + | |- | ||
| + | ! Extremely Sharp Cheddar {{name|Attack|+3}} | ||
| + | | [[File:Calico Pizza.png|24px|link=]] Calico Pizza | ||
| + | | [[File:Stuffed Mushrooms.png|24px|link=]] Stuffed Mushrooms | ||
| + | | [[File:Elf Quesadilla.png|24px|link=]] Elf Quesadilla | ||
| + | | N/A | ||
| + | | [[File:Nachos Of The Desert.png|24px|link=]] Nachos Of The Desert | ||
| + | |- | ||
| + | ! Shrimp {{name|Fishing|+3}} | ||
| + | | [[File:Cioppino.png|24px|link=]] Cioppino | ||
| + | | [[File:Rainforest Shrimp.png|24px|link=]] Rainforest Shrimp | ||
| + | | [[File:Shrimp Donut.png|24px|link=]] Shrimp Donut | ||
| + | | [[File:Smell Of The Sea.png|24px|link=]] Smell Of The Sea | ||
| + | | [[File:Desert Gumbo.png|24px|link=]] Desert Gumbo | ||
| + | |} | ||
| + | |||
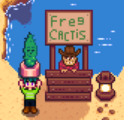
| + | ===Free Cactus=== | ||
| + | Once per festival, the player may obtain a cactus decor item from the Cactus Salesman at the bottom of the map. This decor is one out of several, and its face, colors, and design vary. The player must have an empty inventory slot to receive the cactus.<ref name="answerdialogue" /> | ||
| + | <gallery mode="nolines" widths="300px"> | ||
| + | File:Sly Free Cactus.png|Sly Cactus and Free Cactus Salesman | ||
| + | File:Cactus Options.png|Random Cactus Combinations | ||
| + | </gallery> | ||
| + | |||
| + | ===Skull Cavern=== | ||
| + | During the Desert Festival, [[Marlon]] offers one-day [[Skull Cavern]]-related quests that will award the player Calico Eggs if completed. There are 3 types of quests offered; 2 will randomly be shown each day.<ref name="marlonquest" /> The player does not need to have obtained the [[Skull Key]] to enter the Skull Cavern during the festival, and the Skull Cavern functions as it normally does (including Treasure Rooms and hard-mode ("Dangerous", "Skull Cavern Invasion"); as such, if hard-mode is toggled on, one may want to toggle it off before the festival!). | ||
| + | |||
| + | {|class="wikitable mw-collapsible mw-collapsed" | ||
| + | !colspan="4" style="text-align: left;"|Skull Cavern Quests | ||
| + | |- | ||
| + | !Quest Name | ||
| + | !Quest Text | ||
| + | !Requirements | ||
| + | !Reward | ||
| + | |- | ||
| + | |Monster Hunt | ||
| + | |Descend into the Skull Cavern and slay 10 [Monster]. | ||
| + | |'''Slay 10 of one of the following:''' | ||
| + | *[[Serpent]]s | ||
| + | *[[Purple Slime]]s | ||
| + | *[[Mummy|Mummies]] | ||
| + | |{{Price|35|Calico}} | ||
| + | |- | ||
| + | |Deep Dive | ||
| + | |Reach level 30 of the Skull Cavern. | ||
| + | |Reach '''level 30''' of the Skull Cavern. | ||
| + | |{{Price|50|Calico}} | ||
| + | |- | ||
| + | |Treasure Hunt | ||
| + | |Collect [Item] from the Skull Cavern. | ||
| + | |'''Collect either of the following items:''' | ||
| + | *{{Name|Omni Geode|12}} | ||
| + | *{{Name|Iridium Ore|15}} | ||
| + | |{{Price|40|Calico}} | ||
| + | |} | ||
| + | |||
| + | The Skull Cavern has a few additions that are unique to the Desert Festival. There are [[Mining#Mining Nodes|Calico Egg Nodes]] which, when mined, yield {{Price|1-3|Calico}}.<ref name="eggnode" /> Players can also obtain {{Price|1-3|Calico}} from slaying monsters and breaking crates and barrels. The chance of finding Calico Egg Nodes steadily increases as players go deeper into the Cavern.<ref name="eggnodechance" /> This is also true for drop chances from monsters and containers. The monster drop chance ranges from 2%-50%<ref name="monstereggchance" />, while the container drop chance has a maximum of 33%<ref name="crateeggchance" />. | ||
| + | |||
| + | Players also gain 1 "Egg Rating" for every 5 floors reached and every Calico Statue activated. Calico Statues may randomly appear once per floor (even Treasure Rooms). Activating the statue can grant a random effect that lasts throughout the player's current descent into the Cavern. | ||
| + | {|class="wikitable mw-collapsible mw-collapsed" | ||
| + | !colspan="3" style="text-align: left;"|Calico Statue Effects | ||
| + | |- | ||
| + | !Status | ||
| + | !Description | ||
| + | !Effect | ||
| + | |- | ||
| + | |rowspan="7"|<span style="color: green;">'''Buff'''</span> | ||
| + | |10 Calico Eggs | ||
| + | |Receive {{Price|10|Calico}}. | ||
| + | |- | ||
| + | |25 Calico Eggs | ||
| + | |Receive {{Price|25|Calico}}. | ||
| + | |- | ||
| + | |50 Calico Eggs | ||
| + | |Receive {{Price|50|Calico}}. | ||
| + | |- | ||
| + | |100 Calico Eggs! | ||
| + | |Receive {{Price|100|Calico}}. | ||
| + | |- | ||
| + | |Speed Boost | ||
| + | |Gain {{Name|Speed|+1|class=inline}} for 5 minutes.<ref name="speedboost" /> | ||
| + | |- | ||
| + | |Full refresh! | ||
| + | |{{Name|Energy|class=inline}} and {{Name|Health|class=inline}} restored to max.<ref name="fullrefresh" /> | ||
| + | |- | ||
| + | |Monsters do less damage | ||
| + | |Monsters do 25% less damage.<ref name="monsterdamage" /> | ||
| + | |- | ||
| + | |'''Neutral''' | ||
| + | |No effect | ||
| + | |Nothing (except the usual +1 Egg Rating). | ||
| + | |- | ||
| + | |rowspan="10"| <span style="color: crimson;">'''Debuff'''</span> | ||
| + | |More Ghosts | ||
| + | |15% more [[Carbon Ghost]]s spawn<ref name="monsterinvasion" />; +1% to overall monster spawn chance<ref name="monstersurge" />. | ||
| + | |- | ||
| + | |More Serpents | ||
| + | |15% more [[Serpent]]s spawn<ref name="monsterinvasion" />; +1% to overall monster spawn chance<ref name="monstersurge" />. | ||
| + | |- | ||
| + | |Skeletons are after you... | ||
| + | |~10% chance to spawn [[Skeleton (dangerous)|dangerous Skeletons]] and ~5% chance to spawn [[Haunted Skull (dangerous)|dangerous Haunted Skulls]]<ref name="monsterinvasion" />; +1% to overall monster spawn chance<ref name="monstersurge" />. | ||
| + | |- | ||
| + | |More Bats | ||
| + | |15% more [[Bats]] spawn<ref name="monsterinvasion" />; +1% to overall monster spawn chance<ref name="monstersurge" />. | ||
| + | |- | ||
| + | |Bugs become Assassin Bugs | ||
| + | |[[Armored Bug]]s are replaced with Assassin Bugs (50 Damage, 500 Health, increased Speed, not invincible, uses "dangerous" movement).<ref name="assassinbug" /> | ||
| + | |- | ||
| + | |Lose more eggs when you're knocked out | ||
| + | |Lose 50% of the Calico Eggs in inventory when knocked out.<ref name="eggslost" /> | ||
| + | |- | ||
| + | |Food is half as effective | ||
| + | |50% less Energy and Health from eating food.<ref name="foodhalf" /> | ||
| + | |- | ||
| + | |More monsters | ||
| + | |20% more of all monster types spawn.<ref name="monstersurge" /> | ||
| + | |- | ||
| + | |Monsters do more damage | ||
| + | |Monsters do 25% more damage.<ref name="monsterdamage" /> | ||
| + | |- | ||
| + | |Mummies have become angry | ||
| + | |[[Mummy|Mummies]] are replaced with their [[Mummy (dangerous)|dangerous variants]] and have doubled Speed.<ref name="angrymummy" /> | ||
| + | |} | ||
| + | |||
| + | Talking to [[Gil]] presents the option to submit the day's highest Egg Rating for prizes. These prizes, based on the player's Egg Rating, include Calico Eggs, food, drinks, and other items.<ref name="answerdialogue" /> | ||
| + | |||
| + | {|class="wikitable mw-collapsible mw-collapsed" | ||
| + | !colspan="3" style="text-align: left;"|Gil's Egg Rating Prizes | ||
| + | |- | ||
| + | !Egg Rating | ||
| + | !Gil's Response | ||
| + | !Rewards | ||
| + | |- | ||
| + | |1-4 | ||
| + | |"...[Egg Rating #]? Hahahaha.... okay, kiddo. Here's a little prizey for you... now, go along and play with the other kids." | ||
| + | | | ||
| + | *{{Name|Calico Egg|1}} | ||
| + | *{{Name|Miner's Treat|1}} | ||
| + | |- | ||
| + | |5-9 | ||
| + | |"...[Egg Rating #]? That's not too impressive, but at least you had the gumption to try. Here's a little something." | ||
| + | | | ||
| + | *{{Name|Calico Egg|10}} | ||
| + | *{{Name|Coffee|1}} | ||
| + | |- | ||
| + | |10-14 | ||
| + | |"[Egg Rating #], huh? Not bad, not bad... of course, when I was your age I was doin' twice that. With a Rusty Sword, and no food!" | ||
| + | | | ||
| + | *{{Name|Calico Egg|25}} | ||
| + | *{{Name|Triple Shot Espresso|1}} | ||
| + | |- | ||
| + | |15-19 | ||
| + | |"[Egg Rating #]... that ain't bad at all. That's the kind of number we're looking for in the Adventurer's Guild. Here's your prize." | ||
| + | | | ||
| + | *{{Name|Calico Egg|50}} | ||
| + | *{{Name|Triple Shot Espresso|3}} | ||
| + | |- | ||
| + | |20-24 | ||
| + | |"[Egg Rating #]? Okay, now I'm impressed... Hey, Marlon! Get a load of this... an Egg Rating of [Egg Rating #] for the day!" | ||
| + | | | ||
| + | *{{Name|Calico Egg|100}} | ||
| + | *{{Name|Triple Shot Espresso|5}} | ||
| + | |- | ||
| + | |25-54 | ||
| + | |"[Egg Rating #]!?! Well, I'll be... We've got a real Calico Egg hunter here!" | ||
| + | | | ||
| + | *{{Name|Calico Egg|200}} | ||
| + | *{{Name|Gil's Hat|class=inline}} (can only be received once) | ||
| + | *{{Name|Triple Shot Espresso|5|class=inline}} (if Gil's Hat has already been received) | ||
| + | |- | ||
| + | |55-999 | ||
| + | |"[Egg Rating #]!?!?!?!?!?!?!?" | ||
| + | | | ||
| + | *{{Name|Calico Egg|500}} | ||
| + | *{{Name|Magic Rock Candy|1}} | ||
| + | |- | ||
| + | |1000+ | ||
| + | |''You hear a voice in your head: ‘It would be dishonorable to submit an egg rating acquired through the use of cheat code software!’'' | ||
| + | |None | ||
| + | |} | ||
| + | |||
| + | ===Harvey's Medical Station=== | ||
| + | If the player loses all Health in the Skull Cavern and is knocked out, they will awaken at Harvey's "shop" located in the festival next to the Cavern entrance. The player will awaken with 10 Health, and they will not lose any additional Energy or [[Gold]]. The player will keep their items, but they will lose 20% of the Calico Eggs in their inventory.<ref name="eggslost" /> Talking to Harvey will result in the same dialogue as before the player died. | ||
| + | |||
| + | ===Willy's Fishing Quests=== | ||
| + | [[Willy]] offers one-day fishing-related quests that will award the player Calico Eggs upon completion. There is a different quest for each day of the festival.<ref name="answerdialogue" /> On Spring 17, the {{Name|Golden Bobber|class=inline}} will appear in the first Treasure Chest fished up.<ref name="goldenbobber" /> | ||
| + | |||
| + | {|class="wikitable mw-collapsible mw-collapsed" | ||
| + | !colspan="3" style="text-align: left;"|Fishing Quests | ||
| + | |- | ||
| + | !Day | ||
| + | !Quest Description | ||
| + | !Reward | ||
| + | |- | ||
| + | |{{Season|Spring|15}} | ||
| + | |Willy's Challenge: Catch 3 [[Sandfish]]. | ||
| + | |{{Price|25|Calico}} | ||
| + | |- | ||
| + | |{{Season|Spring|16}} | ||
| + | |Willy's Challenge: Catch a [[Scorpion Carp]]. | ||
| + | |{{Price|50|Calico}} | ||
| + | |- | ||
| + | |{{Season|Spring|17}} | ||
| + | |Willy: A fish swallowed me rare [[Golden Bobber|golden bobber]]! There's 30 eggs for whoever returns it. | ||
| + | |{{Price|30|Calico}} | ||
| + | |} | ||
| + | |||
| + | ===Scholar=== | ||
| + | The Scholar asks the player a series of four questions. If all four answers are correct, then the reward is {{Price|50|Calico}}. The player has one chance per day to achieve this. After a successful round of questions, the player must wait until next year to receive another reward. Questions are randomized every time they are asked. | ||
| + | |||
| + | One of the questions asks the player to recall their total number of steps taken. Three options are given. The order of the options is randomized, but the numerically middle value will always be correct.<ref name="scholarmiddle" /> | ||
| + | {|class="wikitable mw-collapsible mw-collapsed" | ||
| + | !colspan="3" style="text-align: left;"|Scholar's Questions and Answers | ||
| + | |- | ||
| + | !#!!Questions!!Answers | ||
| + | |- | ||
| + | |rowspan="8"|1 | ||
| + | |Who runs the [[Blacksmith]] in [[Pelican Town]]? | ||
| + | |[[Clint]] | ||
| + | |- | ||
| + | |Who runs the [[Museum]] in Pelican Town? | ||
| + | |[[Gunther]] | ||
| + | |- | ||
| + | |Who runs the [[Saloon]] in Pelican Town? | ||
| + | |[[Gus]] | ||
| + | |- | ||
| + | |Who runs the [[Fish Shop]] in Pelican Town? | ||
| + | |[[Willy]] | ||
| + | |- | ||
| + | |Who runs the [[Marnie's Ranch|Animal Shop]] in Pelican Town? | ||
| + | |[[Marnie]] | ||
| + | |- | ||
| + | |Who runs the [[Pierre's General Store|General Store]] in Pelican Town? | ||
| + | |[[Pierre]] | ||
| + | |- | ||
| + | |What is the date of the season's end? | ||
| + | |28th | ||
| + | |- | ||
| + | |Where are we? | ||
| + | |[[Calico Desert]] | ||
| + | |- | ||
| + | |rowspan="7"|2 | ||
| + | |What season does [[Garlic]] grow in? | ||
| + | |[[Spring]] | ||
| + | |- | ||
| + | |What season does [[Red Cabbage]] grow in? | ||
| + | |[[Summer]] | ||
| + | |- | ||
| + | |What season does [[Artichoke]] grow in? | ||
| + | |[[Fall]] | ||
| + | |- | ||
| + | |When does the [[Apricot Tree|Apricot tree]] bear fruit? | ||
| + | |Spring | ||
| + | |- | ||
| + | |When does the [[Peach Tree|Peach tree]] bear fruit? | ||
| + | |Summer | ||
| + | |- | ||
| + | |When does the [[Pomegranate Tree|Pomegranate tree]] bear fruit? | ||
| + | |Fall | ||
| + | |- | ||
| + | |When is [[Pierre's General Store|Pierre's Shop]] normally closed? | ||
| + | |Wednesday | ||
| + | |- | ||
| + | |rowspan="10"|3 | ||
| + | |In what season can you catch [[Carp]]? | ||
| + | |Any Season | ||
| + | |- | ||
| + | |In what season can you catch [[Pufferfish]]? | ||
| + | |Summer | ||
| + | |- | ||
| + | |In what season can you catch [[Salmon]]? | ||
| + | |Fall | ||
| + | |- | ||
| + | |In what season can you catch [[Squid]]? | ||
| + | |[[Winter]] | ||
| + | |- | ||
| + | |How many steps have you taken? | ||
| + | |Choose the numerically middle value. | ||
| + | |- | ||
| + | |How much does a [[Chicken]] cost? | ||
| + | |{{Price|800}} | ||
| + | |- | ||
| + | |How much does a [[Cow]] cost? | ||
| + | |{{Price|1500}} | ||
| + | |- | ||
| + | |How much does a [[Pig]] cost? | ||
| + | |{{Price|16000}} | ||
| + | |- | ||
| + | |How much does a [[Rabbit]] cost? | ||
| + | |{{Price|8000}} | ||
| + | |- | ||
| + | |How much does a [[Duck]] cost? | ||
| + | |{{Price|1200}} | ||
| + | |- | ||
| + | |rowspan="5"|4 | ||
| + | |Where might you catch the [[Stonefish]]? | ||
| + | |[[The Mines|Mine]] level 20 | ||
| + | |- | ||
| + | |Where might you catch the [[Ice Pip]]? | ||
| + | |Mine level 60 | ||
| + | |- | ||
| + | |Where might you catch the [[Lava Eel]]? | ||
| + | |Mine level 100 | ||
| + | |- | ||
| + | |What is [[George]]'s last name? | ||
| + | |Mullner | ||
| + | |- | ||
| + | |How many [[Garbage Can|garbage cans]] are there in Pelican Town? | ||
| + | |8 | ||
| + | |} | ||
| + | |||
| + | ===Shrouded Figure=== | ||
| + | The Shrouded Figure offers to teleport the player back to their farm for {{Price|250}}, like in the [[Night Market]] during Winter. It functions the same as the [[Warp Totem: Farm]]. | ||
| + | |||
| + | ===Traveling Cart=== | ||
| + | The [[Traveling Cart]] makes an appearance with her standard cart, sporting an umbrella over the pig's head. A selection of the usual items is sold (with a new re-randomized stock for each of the 3 days), including the [[Wedding Ring]] recipe in a Multiplayer game. The shop opens at 12 pm. | ||
| + | |||
| + | ==Villager Attendees== | ||
| + | Like the [[Night Market]], villagers will deviate from their regular schedules to attend the Desert Festival. The lists below show which villagers attend on which days each year. | ||
| + | |||
| + | If a villager hosts a Villager Shop, then this will override their regular schedules (e.g., they may appear at the Desert Festival on days they normally would not).<ref name="villagerchance" /> | ||
| + | |||
| + | <div style="float: left; margin-right: 36px;"> | ||
| + | '''Spring 15''' | ||
| + | {{NPC|Abigail}}{{NPC|Alex}}{{NPC|Caroline}}{{NPC|Elliott}}{{NPC|Gus}}{{NPC|Haley}}{{NPC|Leah}}{{NPC|Pierre}}{{NPC|Sam}}{{NPC|Sebastian}} | ||
| + | </div> | ||
| + | <div style="float: left; margin-right: 36px;"> | ||
| + | '''Spring 16''' | ||
| + | {{NPC|Clint}}{{NPC|Demetrius}}{{NPC|Haley}}{{NPC|Leo}}{{NPC|Linus}}{{NPC|Maru}}{{NPC|Pam}}{{NPC|Penny}}{{NPC|Robin}} | ||
| + | </div> | ||
| + | <div style="float: left; margin-right: 36px;"> | ||
| + | '''Spring 17''' | ||
| + | {{NPC|Evelyn}}{{NPC|George}}{{NPC|Jas}}{{NPC|Jodi}}{{NPC|Kent}}{{NPC|Marnie}}{{NPC|Shane}}{{NPC|Vincent}} | ||
| + | </div> | ||
| + | <div style="float: left;"> | ||
| + | '''Every day''' | ||
| + | {{NPC|Emily}}{{NPC|Harvey}}{{NPC|Lewis}}{{NPC|Sandy}}{{NPC|Willy}} | ||
| + | </div> | ||
| + | {{Clear}} | ||
| + | |||
| + | ==Notes== | ||
| + | * The trash bin next to the Calico Egg Merchant's shop can be checked and contains {{Price|5-8|Calico}} once per day.<ref name="trasheggs" /> | ||
| + | * Since the game uses a unique desert map during festival days, items a player has placed in [[the Desert]] (like [[Chest]]s) may disappear during the Desert Festival. These items should return on Spring 18. | ||
| + | |||
| + | ==Trivia== | ||
| + | *The racer Shoebiscuit's name is likely a reference to the famous race horse Seabiscuit. | ||
| + | |||
| + | ==References== | ||
| + | <references> | ||
| + | <ref name="racewin">See <samp>DesertFestival::OnRaceWon</samp> and <samp>DesertFestival::CollectRacePrizes</samp> in the game code.</ref> | ||
| + | <ref name="racebet">See <samp>DesertFestival::CanMakeAnotherRaceGuess</samp> in the game code.</ref> | ||
| + | <ref name="shoplists">See <samp>Data\Shops.xnb</samp>, cases "DesertFestival_EggShop" and "DesertFestival_''VillagerName''", in the game files.</ref> | ||
| + | <ref name="villagerchance">See <samp>DesertFestival::CreateDaySaveRandom</samp> and <samp>DesertFestival::SetupMerchantSchedule</samp> in the game code.</ref> | ||
| + | <ref name="emilyoutfit">See <samp>Data\MakeoverOutfits.xnb</samp> in the game files.</ref> | ||
| + | <ref name="answerdialogue">See <samp>DesertFestival::answerDialogueAction</samp>, cases "Cook", "CactusMan_Yes", "Gil_EggRating_Yes", and "Fishing_Quest_Yes" in the game code.</ref> | ||
| + | <ref name="marlonquest">See <samp>Data\SpecialOrders.xnb</samp>, ID "DesertFestivalMarlon" in the game files.</ref> | ||
| + | <ref name="eggnode">See <samp>GameLocation::breakStone</samp> in the game code.</ref> | ||
| + | <ref name="eggnodechance">See <samp>MineShaft::createLitterObject</samp> and <samp>MineShaft::getAppropriateOre</samp> in the game code.</ref> | ||
| + | <ref name="monstereggchance">See <samp>Monster::InitializeForLocation</samp> in the game code.</ref> | ||
| + | <ref name="crateeggchance">See <samp>BreakableContainer::releaseContents</samp> in the game code.</ref> | ||
| + | <ref name="speedboost">See <samp>DesertFestival::addCalicoStatueSpeedBuff</samp> in the game code.</ref> | ||
| + | <ref name="fullrefresh">See <samp>FarmerTeam::OnCalicoStatueEffectAdded</samp> in the game code.</ref> | ||
| + | <ref name="monsterdamage">See <samp>Farmer::takeDamage</samp> in the game code.</ref> | ||
| + | <ref name="monsterinvasion">See <samp>MineShaft::populateLevel::invasionId</samp> in the game code.</ref> | ||
| + | <ref name="monstersurge">See <samp>MineShaft::adjustLevelChances::finalModifier</samp> in the game code.</ref> | ||
| + | <ref name="assassinbug">See <samp>MineShaft::getMonsterForThisLevel</samp> and <samp>Monsters::Bug</samp>, ID "Assassin" in the game code.</ref> | ||
| + | <ref name="eggslost">See <samp>Farmer::Update::eggPercentToRemove</samp> in the game code.</ref> | ||
| + | <ref name="foodhalf">See <samp>Farmer::doneEating</samp> in the game code. Food will always heal at least 1 Energy and 1 Health.</ref> | ||
| + | <ref name="angrymummy">See <samp>MineShaft::getMonsterForThisLevel::mummy</samp> in the game code.</ref> | ||
| + | <ref name="goldenbobber">See <samp>FishingRod::openTreasureMenuEndFunction</samp> in the game code.</ref> | ||
| + | <ref name="scholarmiddle">See <samp>DesertFestival::generateNextScholarQuestion</samp> in the game code.</ref> | ||
| + | <ref name="trasheggs">See <samp>Data\GarbageCans.xnb</samp>, ID "DesertFestival", in the game files.</ref> | ||
| + | </references> | ||
| + | |||
| + | ==연혁== | ||
| + | {{History|1.6|Introduced.}} | ||
| + | {{History|1.6.4|Can no longer get calico rating points by going down the normal mines.}} | ||
| + | {{History|1.6.6|Fixed Emily makeover event from being hard to skip.}} | ||
| + | |||
| + | {{NavboxFestivals}} | ||
| + | |||
| + | [[Category:봄 축제]] | ||
| + | |||
| + | [[de:Wüstenfestival]] | ||
| + | [[en:Desert Festival]] | ||
| + | [[es:Festival del Desierto]] | ||
| + | [[fr:Festival du désert]] | ||
| + | [[it:Festival del Deserto]] | ||
| + | [[ja:砂漠フェスティバル]] | ||
| + | [[hu:Sivatagi fesztivál]] | ||
| + | [[pt:Festival do Deserto]] | ||
| + | [[ru:Пустынный фестиваль]] | ||
| + | [[tr:Çöl Şöleni]] | ||
| + | [[zh:沙漠节]] | ||
2024년 6월 22일 (토) 02:11 기준 최신판

|
불완전한 번역 이 기사 또는 섹션은 한국어로 완전히 번역되지 않았습니다.
편집하여 번역하는 데 도움을 주시면 대단히 감사하겠습니다! |
이 페이지 혹은 문단에는 스타듀밸리 1.6 업데이트에 표시되지 않은 스포일러가 포함되어 있습니다. 플레이어는 이 문서를 피하거나, 혹은 읽을 때 주의하시기 바랍니다. |

사막 축제는 매년 봄 15일과 16일 17일에 사막에서 벌어지는 축제입니다. 비축제일과 달리 팸이 버스 정류장에 도착하기 전에도 사막에 들어갈 수 있습니다. 공식적으로는 매일 오전 10시에 시작되지만, 축제 마지막 날에는 팸이 평소보다 일찍 오전 9시에 도착해야 버스를 탈 수 있습니다. 이 이벤트에 참여하려면 버스가 수리되어 있어야 합니다.
샌디의 상점은 축제 기간 동안 열리지 않지만, 플레이어는 오아시스에 들어갈 수 있으며 사막 상인의 상점은 이용 가능합니다.
여러 도전과 놀이를 통해 축제 통화인 ![]() 칼리코 달걀을 얻을 수 있습니다. 칼리코 달걀은 게임 내에서 물리적 아이템으로 다양한 상점에서 아이템을 구매하는 데 사용할 수 있습니다. 이 달걀은 날마다 유지되지만, 축제가 끝나면 상자나 인벤토리에서 사라지며 다음 해로 이어지지 않습니다.
칼리코 달걀을 얻을 수 있습니다. 칼리코 달걀은 게임 내에서 물리적 아이템으로 다양한 상점에서 아이템을 구매하는 데 사용할 수 있습니다. 이 달걀은 날마다 유지되지만, 축제가 끝나면 상자나 인벤토리에서 사라지며 다음 해로 이어지지 않습니다.
달걀은 배송 상자에 팔 수 있지만, 판매 가격은 ![]() 0골드입니다.
0골드입니다.
Attractions
The Races
하루 종일 매 시간마다 열리는 경주에 베팅할 수 있습니다. 플레이어가 선택한 참가자가 승리하면 ![]() 20을 받습니다. 플레이어가 가장 느린 참가자인 Escar-go에 처음으로 베팅하여 승리할 경우
20을 받습니다. 플레이어가 가장 느린 참가자인 Escar-go에 처음으로 베팅하여 승리할 경우 ![]() 100[1]을 받습니다. 플레이어는 오후 9시 50분까지 베팅할 수 있습니다.[2] 플레이어가 주요 축제 구역에 없으면 경주가 진행되지 않으므로, 결과를 확인하려면 반드시 기다려야 합니다.
100[1]을 받습니다. 플레이어는 오후 9시 50분까지 베팅할 수 있습니다.[2] 플레이어가 주요 축제 구역에 없으면 경주가 진행되지 않으므로, 결과를 확인하려면 반드시 기다려야 합니다.
플레이어는 오아시스 옆의 수상한 남자에게 ![]() 1를 주고 원하는 경주 참가자를 탈락시킬 수 있습니다.
1를 주고 원하는 경주 참가자를 탈락시킬 수 있습니다.
5명의 참가자는 스피드 루스터, 킹 스팅, 슈비스킷, 에스카-고, Cactus Crawler입니다. 매일 3명의 참가자만 경주에 참여합니다.

스피드 루스터

킹 스팅

슈비스킷

에스카-고

Cactus Crawler


Calico Egg Merchant
칼리코 달걀 상인은 여러 액세서리와 가구 아이템, 다양한 사용 가능한 아이템을 판매합니다. 일부 아이템은 매일 판매되며, 다른 아이템은 특정 날에만 구매할 수 있습니다.[3] 한정 수량의 아이템은 매일 보충됩니다.
| Permanent Stock | ||
|---|---|---|
| Image | Name | Price |
| Mystery Box (10) | ||
| Mummy Mask | ||
 |
Blue Bow | |
 |
Dark Velvet Bow | |
| Mega Bomb | ||
| Spicy Eel* (5) | ||
| Crab Cakes* (5) | ||
| Eggplant Parmesan* (5) | ||
| Pumpkin Soup* (5) | ||
| Lucky Lunch* (5) | ||
| Woodcutter's Weekly | ||
| *Note: one of these five dishes is randomly chosen. | ||
| Rotating Stock | |||||||||||||||||||||||||||||||||||||||||||||||||||||||||||||||
|---|---|---|---|---|---|---|---|---|---|---|---|---|---|---|---|---|---|---|---|---|---|---|---|---|---|---|---|---|---|---|---|---|---|---|---|---|---|---|---|---|---|---|---|---|---|---|---|---|---|---|---|---|---|---|---|---|---|---|---|---|---|---|---|
| |||||||||||||||||||||||||||||||||||||||||||||||||||||||||||||||
Villager Shops
매일 두 명의 마을 사람이 무작위로 선택되어 축제에서 자신만의 상점을 운영합니다.[4] 이 상점들은 오후 12시부터 자정까지 운영되며, 그들의 재고 목록은 아래에 나와 있습니다.[3] 한정 수량의 아이템은 마을 사람이 상점을 운영하는 날마다 보충됩니다. 플레이어는 마을 사람 상점의 뒤로 들어갈 수 있어, 마을 사람들이 상점에 있을 때도 선물 주기, 대화, 퀘스트 완료가 가능합니다.
|
|
| |||||||||||||||||||||||||||||||||||||||||||||||||||||||||||||||||||||||||||||||||||||||||||||||||||||||||||||||||||||||||||||||||||||||||||||||||||||||||||||||||||||||||||||||||||||||||||||||||||||||||||||||||||||||||||||||||||||||||||||||||||||||||||||||||||||||||||||||||||||||||||||||||||||||||||||||||||||||||||||||||||||||||||||||||||||||||||||||||||||||||||||||||||||||||||||||||||||||||||||||||||||||||||||||||||||||||||||||||||||||||||||||||||||||||||||||||||||||||||||||||||||||||||||||||||||||||||||||||||||||
Emily's Outfit Services
매일 에밀리와 샌디는 플레이어에게 짧은 컷신과 함께 무작위로 새 옷을 제공하는데, 여기서 에밀리는 "플레이어를 형상화한" 옷을 선택합니다. 플레이어의 원래 옷은 그들의 인벤토리에 배치됩니다. 만약 플레이어가 의류 서비스가 일어난 오두막에 다시 들어가려고 해도, 플레이어는 입장할 수 없고, 에밀리는 플레이어가 새 옷을 입으니 잘 어울린다고 말합니다. 에밀리가 마을 주민 가게를 운영하는 날에는 샌디가 약간의 망설임 끝에 인수인계를 할 것입니다.
이곳엔 61개의 메이크오버 의상이 있습니다: 34개의 성중립적인 의상, 13개의 남성 전용 의상, 14개의 여성 전용 의상. [5] 각 의상은 셔츠, 팬티, 그리고 모자로 구성되어 있습니다. Of note, the Dark Ballcap, Joja Cap, and Laurel Wreath Crown can be obtained with three of the gender-neutral outfits. In addition, the Tight Pants can be obtained from a few outfits, and a "soft edge" variant of Basic Pullover (M) can be obtained from one of the male-only outfits.
Chef

The Chef gives the player a choice of ingredients to make them a meal with varying effects depending on the ingredients chosen. The player may do so repeatedly and choose different ingredients each time. The meal will be eaten; any effects will be applied immediately and last for 7 minutes.[6] The buffs from dishes are a combination of buffs from both ingredient choices, e.g; Crystal Cake grants both ![]() 채광 (+3) and
채광 (+3) and ![]() 행운 (+1) buffs.
행운 (+1) buffs.
Any dish will restore the player to maximum health and energy.[6] In addition, these dishes will stack with any food or drink buffs from the player.
| Choices: | Rich Marinara |
Mushroom Creme |
Cherry Syrup |
Pungent Garlic |
Uncomfortably Hot Sauce |
|---|---|---|---|---|---|
| Hearty Beans |
N/A | ||||
| Cave Loaf |
N/A | ||||
| Rare Fruit |
N/A | ||||
| Extremely Sharp Cheddar |
N/A | ||||
| Shrimp |
Free Cactus
Once per festival, the player may obtain a cactus decor item from the Cactus Salesman at the bottom of the map. This decor is one out of several, and its face, colors, and design vary. The player must have an empty inventory slot to receive the cactus.[6]
Sly Cactus and Free Cactus Salesman

Random Cactus Combinations


Skull Cavern
During the Desert Festival, Marlon offers one-day Skull Cavern-related quests that will award the player Calico Eggs if completed. There are 3 types of quests offered; 2 will randomly be shown each day.[7] The player does not need to have obtained the Skull Key to enter the Skull Cavern during the festival, and the Skull Cavern functions as it normally does (including Treasure Rooms and hard-mode ("Dangerous", "Skull Cavern Invasion"); as such, if hard-mode is toggled on, one may want to toggle it off before the festival!).
| Skull Cavern Quests | |||
|---|---|---|---|
| Quest Name | Quest Text | Requirements | Reward |
| Monster Hunt | Descend into the Skull Cavern and slay 10 [Monster]. | Slay 10 of one of the following: | |
| Deep Dive | Reach level 30 of the Skull Cavern. | Reach level 30 of the Skull Cavern. | |
| Treasure Hunt | Collect [Item] from the Skull Cavern. | Collect either of the following items: | |
The Skull Cavern has a few additions that are unique to the Desert Festival. There are Calico Egg Nodes which, when mined, yield ![]() 1-3.[8] Players can also obtain
1-3.[8] Players can also obtain ![]() 1-3 from slaying monsters and breaking crates and barrels. The chance of finding Calico Egg Nodes steadily increases as players go deeper into the Cavern.[9] This is also true for drop chances from monsters and containers. The monster drop chance ranges from 2%-50%[10], while the container drop chance has a maximum of 33%[11].
1-3 from slaying monsters and breaking crates and barrels. The chance of finding Calico Egg Nodes steadily increases as players go deeper into the Cavern.[9] This is also true for drop chances from monsters and containers. The monster drop chance ranges from 2%-50%[10], while the container drop chance has a maximum of 33%[11].
Players also gain 1 "Egg Rating" for every 5 floors reached and every Calico Statue activated. Calico Statues may randomly appear once per floor (even Treasure Rooms). Activating the statue can grant a random effect that lasts throughout the player's current descent into the Cavern.
| Calico Statue Effects | ||
|---|---|---|
| Status | Description | Effect |
| Buff | 10 Calico Eggs | Receive |
| 25 Calico Eggs | Receive | |
| 50 Calico Eggs | Receive | |
| 100 Calico Eggs! | Receive | |
| Speed Boost | Gain | |
| Full refresh! | ||
| Monsters do less damage | Monsters do 25% less damage.[14] | |
| Neutral | No effect | Nothing (except the usual +1 Egg Rating). |
| Debuff | More Ghosts | 15% more Carbon Ghosts spawn[15]; +1% to overall monster spawn chance[16]. |
| More Serpents | 15% more Serpents spawn[15]; +1% to overall monster spawn chance[16]. | |
| Skeletons are after you... | ~10% chance to spawn dangerous Skeletons and ~5% chance to spawn dangerous Haunted Skulls[15]; +1% to overall monster spawn chance[16]. | |
| More Bats | 15% more Bats spawn[15]; +1% to overall monster spawn chance[16]. | |
| Bugs become Assassin Bugs | Armored Bugs are replaced with Assassin Bugs (50 Damage, 500 Health, increased Speed, not invincible, uses "dangerous" movement).[17] | |
| Lose more eggs when you're knocked out | Lose 50% of the Calico Eggs in inventory when knocked out.[18] | |
| Food is half as effective | 50% less Energy and Health from eating food.[19] | |
| More monsters | 20% more of all monster types spawn.[16] | |
| Monsters do more damage | Monsters do 25% more damage.[14] | |
| Mummies have become angry | Mummies are replaced with their dangerous variants and have doubled Speed.[20] | |
Talking to Gil presents the option to submit the day's highest Egg Rating for prizes. These prizes, based on the player's Egg Rating, include Calico Eggs, food, drinks, and other items.[6]
| Gil's Egg Rating Prizes | ||
|---|---|---|
| Egg Rating | Gil's Response | Rewards |
| 1-4 | "...[Egg Rating #]? Hahahaha.... okay, kiddo. Here's a little prizey for you... now, go along and play with the other kids." |
|
| 5-9 | "...[Egg Rating #]? That's not too impressive, but at least you had the gumption to try. Here's a little something." |
|
| 10-14 | "[Egg Rating #], huh? Not bad, not bad... of course, when I was your age I was doin' twice that. With a Rusty Sword, and no food!" |
|
| 15-19 | "[Egg Rating #]... that ain't bad at all. That's the kind of number we're looking for in the Adventurer's Guild. Here's your prize." |
|
| 20-24 | "[Egg Rating #]? Okay, now I'm impressed... Hey, Marlon! Get a load of this... an Egg Rating of [Egg Rating #] for the day!" |
|
| 25-54 | "[Egg Rating #]!?! Well, I'll be... We've got a real Calico Egg hunter here!" |
|
| 55-999 | "[Egg Rating #]!?!?!?!?!?!?!?" |
|
| 1000+ | You hear a voice in your head: ‘It would be dishonorable to submit an egg rating acquired through the use of cheat code software!’ | None |
Harvey's Medical Station
If the player loses all Health in the Skull Cavern and is knocked out, they will awaken at Harvey's "shop" located in the festival next to the Cavern entrance. The player will awaken with 10 Health, and they will not lose any additional Energy or Gold. The player will keep their items, but they will lose 20% of the Calico Eggs in their inventory.[18] Talking to Harvey will result in the same dialogue as before the player died.
Willy's Fishing Quests
Willy offers one-day fishing-related quests that will award the player Calico Eggs upon completion. There is a different quest for each day of the festival.[6] On Spring 17, the ![]() Golden Bobber will appear in the first Treasure Chest fished up.[21]
Golden Bobber will appear in the first Treasure Chest fished up.[21]
| Fishing Quests | ||
|---|---|---|
| Day | Quest Description | Reward |
| Willy's Challenge: Catch 3 Sandfish. | ||
| Willy's Challenge: Catch a Scorpion Carp. | ||
| Willy: A fish swallowed me rare golden bobber! There's 30 eggs for whoever returns it. | ||
Scholar
The Scholar asks the player a series of four questions. If all four answers are correct, then the reward is ![]() 50. The player has one chance per day to achieve this. After a successful round of questions, the player must wait until next year to receive another reward. Questions are randomized every time they are asked.
50. The player has one chance per day to achieve this. After a successful round of questions, the player must wait until next year to receive another reward. Questions are randomized every time they are asked.
One of the questions asks the player to recall their total number of steps taken. Three options are given. The order of the options is randomized, but the numerically middle value will always be correct.[22]
| Scholar's Questions and Answers | ||
|---|---|---|
| # | Questions | Answers |
| 1 | Who runs the Blacksmith in Pelican Town? | Clint |
| Who runs the Museum in Pelican Town? | Gunther | |
| Who runs the Saloon in Pelican Town? | Gus | |
| Who runs the Fish Shop in Pelican Town? | Willy | |
| Who runs the Animal Shop in Pelican Town? | Marnie | |
| Who runs the General Store in Pelican Town? | Pierre | |
| What is the date of the season's end? | 28th | |
| Where are we? | Calico Desert | |
| 2 | What season does Garlic grow in? | Spring |
| What season does Red Cabbage grow in? | Summer | |
| What season does Artichoke grow in? | Fall | |
| When does the Apricot tree bear fruit? | Spring | |
| When does the Peach tree bear fruit? | Summer | |
| When does the Pomegranate tree bear fruit? | Fall | |
| When is Pierre's Shop normally closed? | Wednesday | |
| 3 | In what season can you catch Carp? | Any Season |
| In what season can you catch Pufferfish? | Summer | |
| In what season can you catch Salmon? | Fall | |
| In what season can you catch Squid? | Winter | |
| How many steps have you taken? | Choose the numerically middle value. | |
| How much does a Chicken cost? | ||
| How much does a Cow cost? | ||
| How much does a Pig cost? | ||
| How much does a Rabbit cost? | ||
| How much does a Duck cost? | ||
| 4 | Where might you catch the Stonefish? | Mine level 20 |
| Where might you catch the Ice Pip? | Mine level 60 | |
| Where might you catch the Lava Eel? | Mine level 100 | |
| What is George's last name? | Mullner | |
| How many garbage cans are there in Pelican Town? | 8 | |
Shrouded Figure
The Shrouded Figure offers to teleport the player back to their farm for ![]() 250골드, like in the Night Market during Winter. It functions the same as the Warp Totem: Farm.
250골드, like in the Night Market during Winter. It functions the same as the Warp Totem: Farm.
Traveling Cart
The Traveling Cart makes an appearance with her standard cart, sporting an umbrella over the pig's head. A selection of the usual items is sold (with a new re-randomized stock for each of the 3 days), including the Wedding Ring recipe in a Multiplayer game. The shop opens at 12 pm.
Villager Attendees
Like the Night Market, villagers will deviate from their regular schedules to attend the Desert Festival. The lists below show which villagers attend on which days each year.
If a villager hosts a Villager Shop, then this will override their regular schedules (e.g., they may appear at the Desert Festival on days they normally would not).[4]
Notes
- The trash bin next to the Calico Egg Merchant's shop can be checked and contains
 5-8 once per day.[23]
 - Since the game uses a unique desert map during festival days, items a player has placed in the Desert (like Chests) may disappear during the Desert Festival. These items should return on Spring 18.
Trivia
- The racer Shoebiscuit's name is likely a reference to the famous race horse Seabiscuit.
References
- ↑ See DesertFestival::OnRaceWon and DesertFestival::CollectRacePrizes in the game code.
- ↑ See DesertFestival::CanMakeAnotherRaceGuess in the game code.
- ↑ 3.0 3.1 See Data\Shops.xnb, cases "DesertFestival_EggShop" and "DesertFestival_VillagerName", in the game files.
- ↑ 4.0 4.1 See DesertFestival::CreateDaySaveRandom and DesertFestival::SetupMerchantSchedule in the game code.
- ↑ 인용 오류:
<ref>태그가 잘못되었습니다;emily outfit라는 이름을 가진 주석에 제공한 텍스트가 없습니다 - ↑ 6.0 6.1 6.2 6.3 6.4 See DesertFestival::answerDialogueAction, cases "Cook", "CactusMan_Yes", "Gil_EggRating_Yes", and "Fishing_Quest_Yes" in the game code.
- ↑ See Data\SpecialOrders.xnb, ID "DesertFestivalMarlon" in the game files.
- ↑ See GameLocation::breakStone in the game code.
- ↑ See MineShaft::createLitterObject and MineShaft::getAppropriateOre in the game code.
- ↑ See Monster::InitializeForLocation in the game code.
- ↑ See BreakableContainer::releaseContents in the game code.
- ↑ See DesertFestival::addCalicoStatueSpeedBuff in the game code.
- ↑ See FarmerTeam::OnCalicoStatueEffectAdded in the game code.
- ↑ 14.0 14.1 See Farmer::takeDamage in the game code.
- ↑ 15.0 15.1 15.2 15.3 See MineShaft::populateLevel::invasionId in the game code.
- ↑ 16.0 16.1 16.2 16.3 16.4 See MineShaft::adjustLevelChances::finalModifier in the game code.
- ↑ See MineShaft::getMonsterForThisLevel and Monsters::Bug, ID "Assassin" in the game code.
- ↑ 18.0 18.1 See Farmer::Update::eggPercentToRemove in the game code.
- ↑ See Farmer::doneEating in the game code. Food will always heal at least 1 Energy and 1 Health.
- ↑ See MineShaft::getMonsterForThisLevel::mummy in the game code.
- ↑ See FishingRod::openTreasureMenuEndFunction in the game code.
- ↑ See DesertFestival::generateNextScholarQuestion in the game code.
- ↑ See Data\GarbageCans.xnb, ID "DesertFestival", in the game files.
인용 오류: <references> 안에 정의된 "emilyoutfit"이라는 이름을 가진 <ref> 태그가 위에서 사용되고 있지 않습니다.
연혁
- 1.6: Introduced.
- 1.6.4: Can no longer get calico rating points by going down the normal mines.
- 1.6.6: Fixed Emily makeover event from being hard to skip.
| 축제 | |
|---|---|
| 봄 | 달걀 축제 • 사막 축제 • 봄꽃 무도회 |
| 여름 | 루아우 • 달빛 해파리들의 춤 |
| 가을 | 스타듀 밸리 품평회 • 영령의 전야제 |
| 겨울 | 얼음 축제 • 야시장 • 겨울 별의 만찬 |